
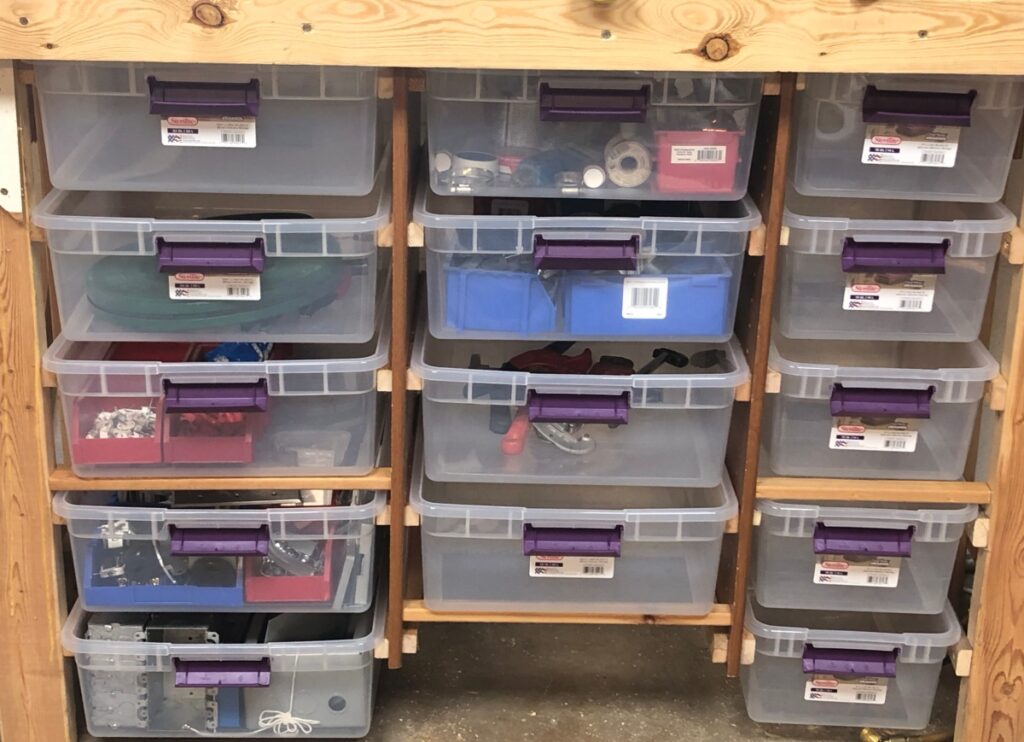
Who doesn’t want to be more effective in 2024? We want to share with you some ideas we had for our small garage workshop. It’s still a work in progress but we will share more as we go. This project is for very lightweight items. Please see additional notes at the bottom.

The purpose of our recent organizing project was to have more surface area for a wood project we plan to do this winter. In return, we will have more room for all other projects we will create on our homestead this year. Getting more done in 2024? I’m in!
To Begin Organizing Our Small Garage Workshop
Tools:
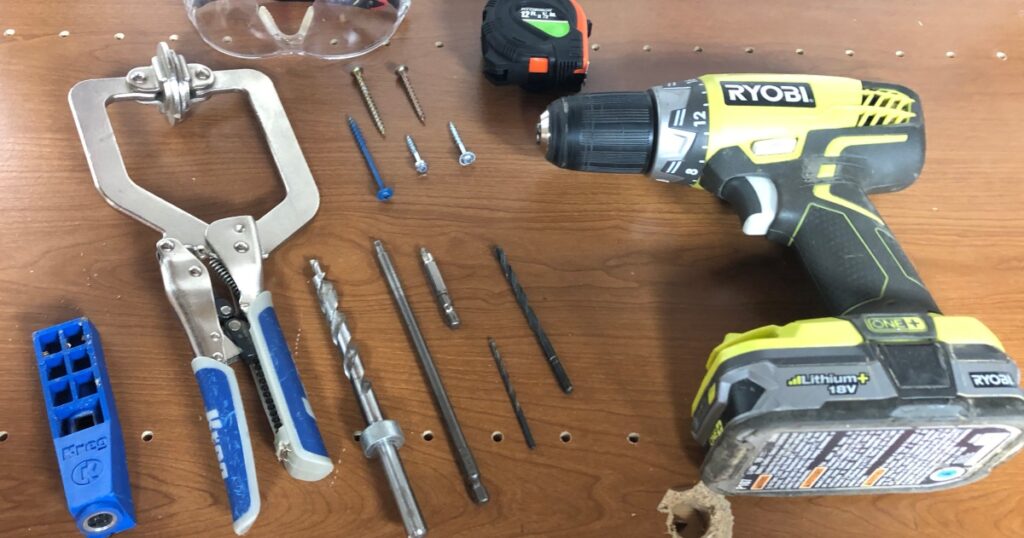
- Clamp
- screws
- electric drill/screwdriver
- Drill bits
- pocket hole kit
- safety glasses
- scrap wood panels/ pieces
- plastic bins (2 sizes: 10 32 quart size, and 5 15 quart size)
- measuring tape
- 2 panels of wood (we used recycled)
- 30 Support (small pieces of wood for supporting the shelves)
- 3 bracing pieces of wood to stabilize the whole projetc
How to Start the Organizing Project
Gather all supplies.
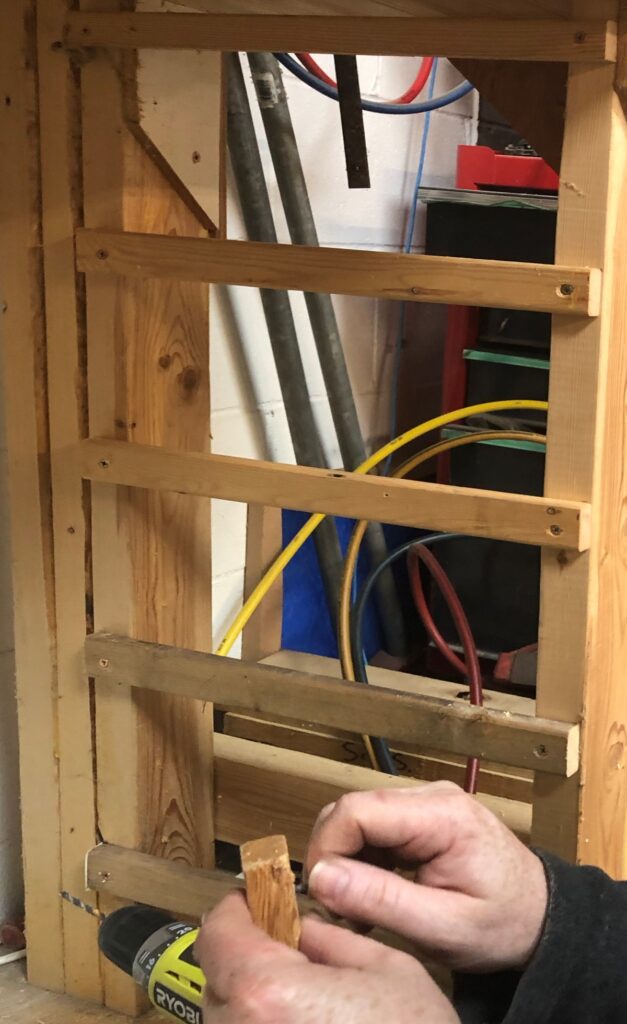
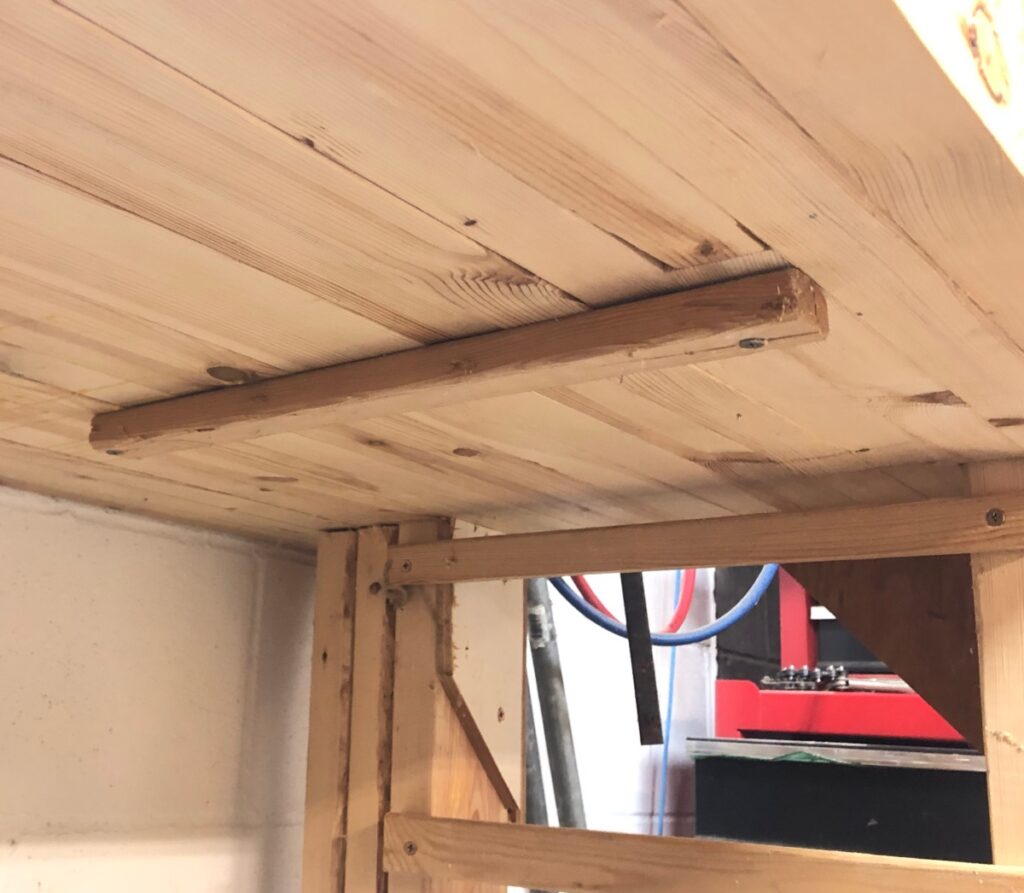
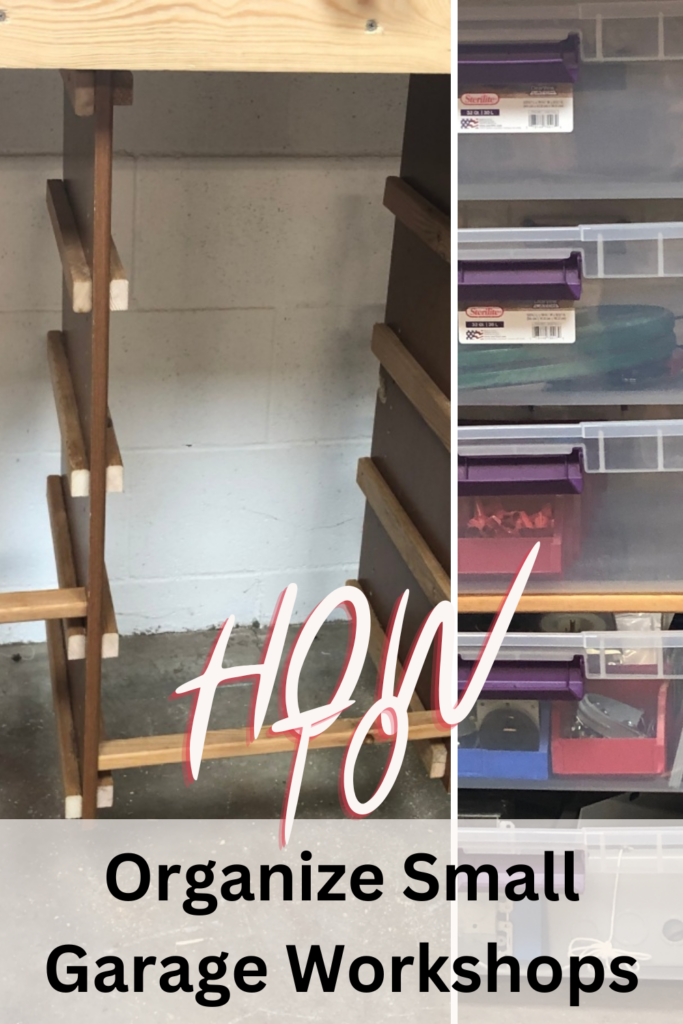
(Step 1) On left side, Measure 5/8″ down from the existing workbench to start the first support. Then measure down 7″ from top of the first support to the top of the next one. Spacing each one 7″ apart, from the top of support to the next. Continue until you finish the first side. We ended up with five shelves with that spacing.
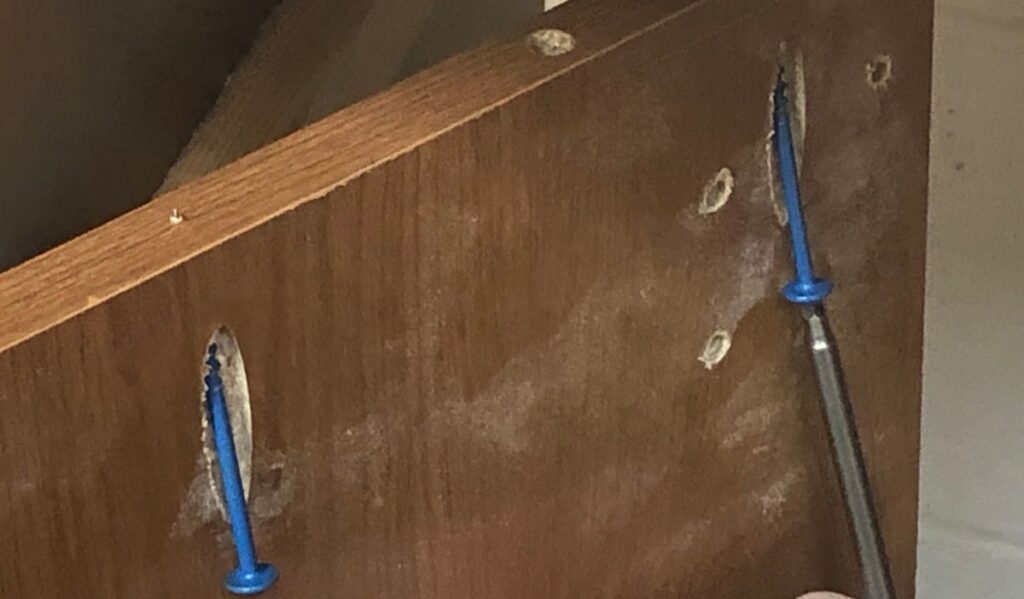
(Step 2) Next, we used the pocket hole jig. We made three pocket holes spaced evenly across the top on one end of the panel. Eyeballing the spacing.
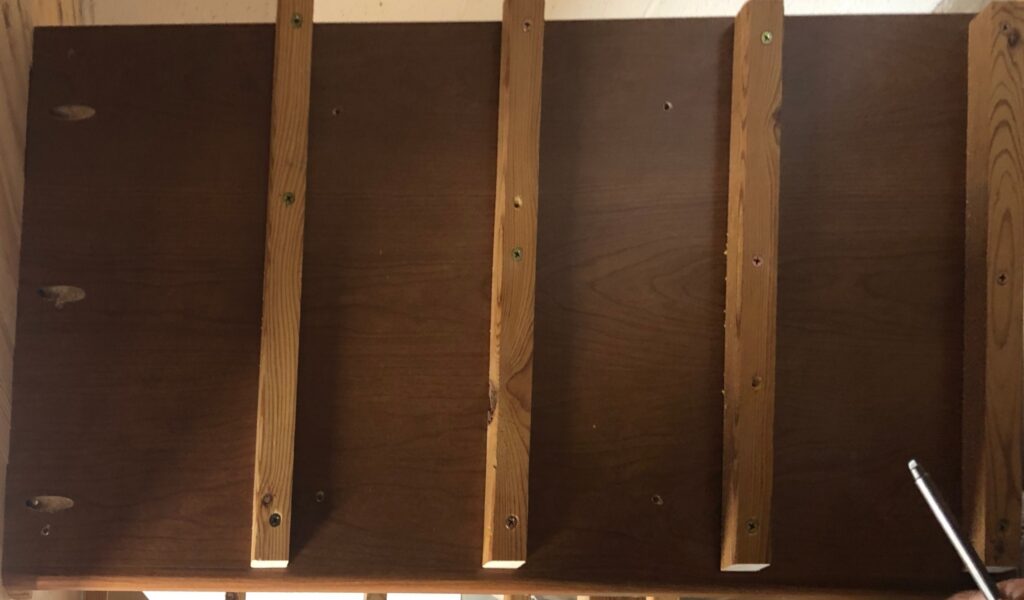
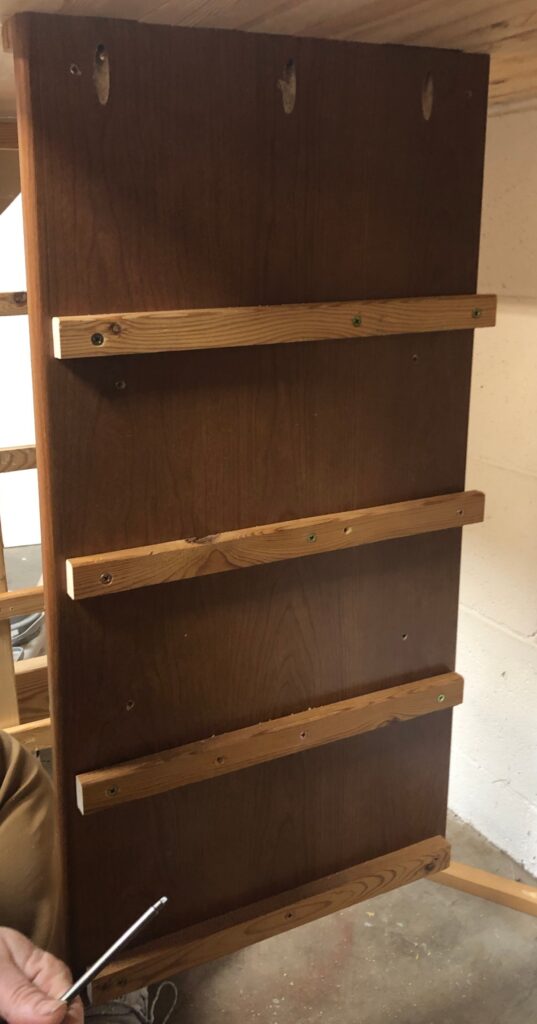
(Step 3) On both sides of the panel, start by marking 5/8″ with a pencil from the top of the panel, then 7″ from that mark, start each support. Predrill first support in place but don’t install fully at this time. Attach the rest of the supports on both sides of the panel as shown above. We repeated the same thing on the second panel.
(Step 4) Repeat step 1 on the right side of your workbench. As shown below.
Installing the Panels for the Organizing Workshop
(Step 5) We measured and marked a line 16″ from the left side of the workbench leg, not the support. We installed a temporary piece of wood where you would want the wood panel to go under the workbench. See photo below. This photo is from the right side but you get the gist. You’ll need one on the right side and one on the left.
(Step 6) Measure 16″ from this panel and mark a line to install another temporary piece of wood. This will be where the second panel will be attached. Then attach the other panel of wood next to the temporary wood piece. Remove the temporary pieces of wood.
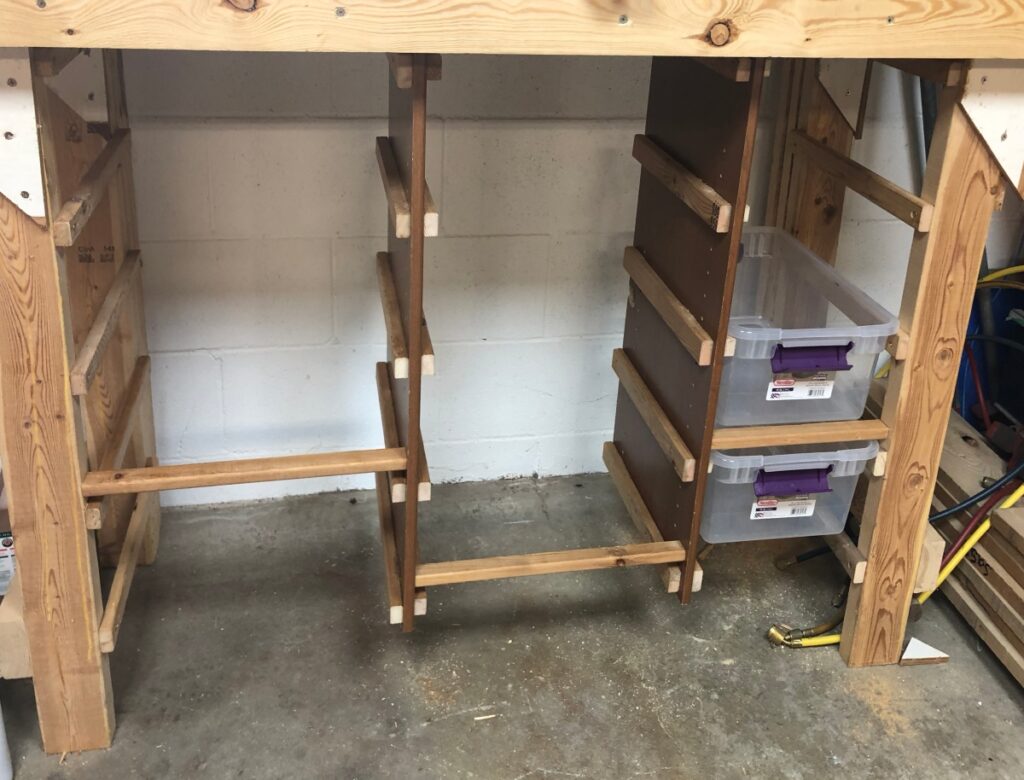
Lastly, add sizes of bins you prefer. You can add tools and if you want to you could label them.
Pin For Later!
Tool Organizing Station
Here is another idea for holding all those power tools.
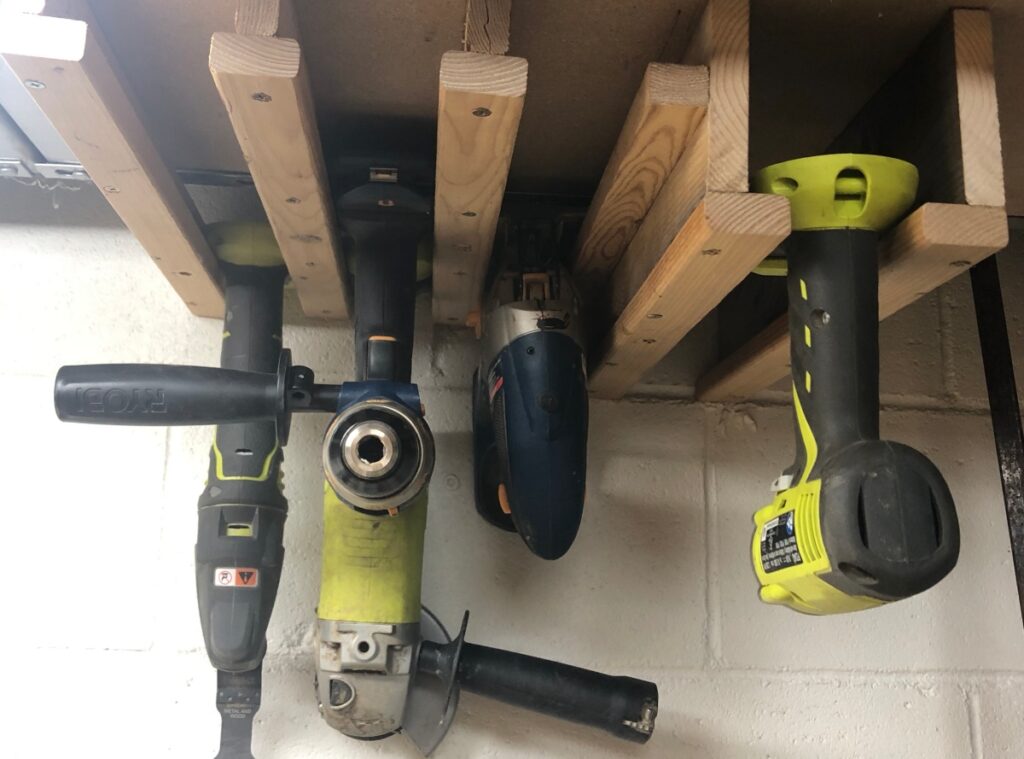
This power tool organizing station allows you to grab your tools easily but also keeps them out of the way when you are not using them. To create this we used scrap pieces of 1×2’s and 1×4’s. We created each slot for each size of tool, however most of them are the same but some may vary.
Notes
We noticed that some of the containers would fall out of supports due to too much weight so we had to shim the supports, so they would be more snug to the existing container. Photo to come soon.
How have you organized your small workspaces? Share in the comments below.
Blessings!
Kimberlee
Great idea and diy!
Kara,
Thanks for your comments! I can’t take the credit, it was all the hubby’s idea.
Kimberlee
Sooo satisfying! Looks really doable too even though I don’t have a bunch of tools on hand. Thanks so much!
Megan,
We do have many tools, but maybe there is someone you know that you can borrow from. That way you don’t have to “own” them all and you save money by not having to buy them all. Thanks for your kind words!
Kimberlee